Featureless AR-15 Build Guide for California
By AR-15 Outfitters · April 9, 2026
AR15 Outfitters may earn a commission on purchases made through links in this guide. This does not affect pricing or our recommendations.
Building a featureless AR-15 for California compliance requires careful attention to state regulations and proper parts selection. This guide walks you through creating a fully compliant rifle that maintains functionality while adhering to California’s assault weapon laws. Whether you’re a first-time builder or experienced enthusiast, understanding the specific requirements and assembly process is essential for a successful featureless AR-15 build.
Understanding Featureless AR-15 Requirements
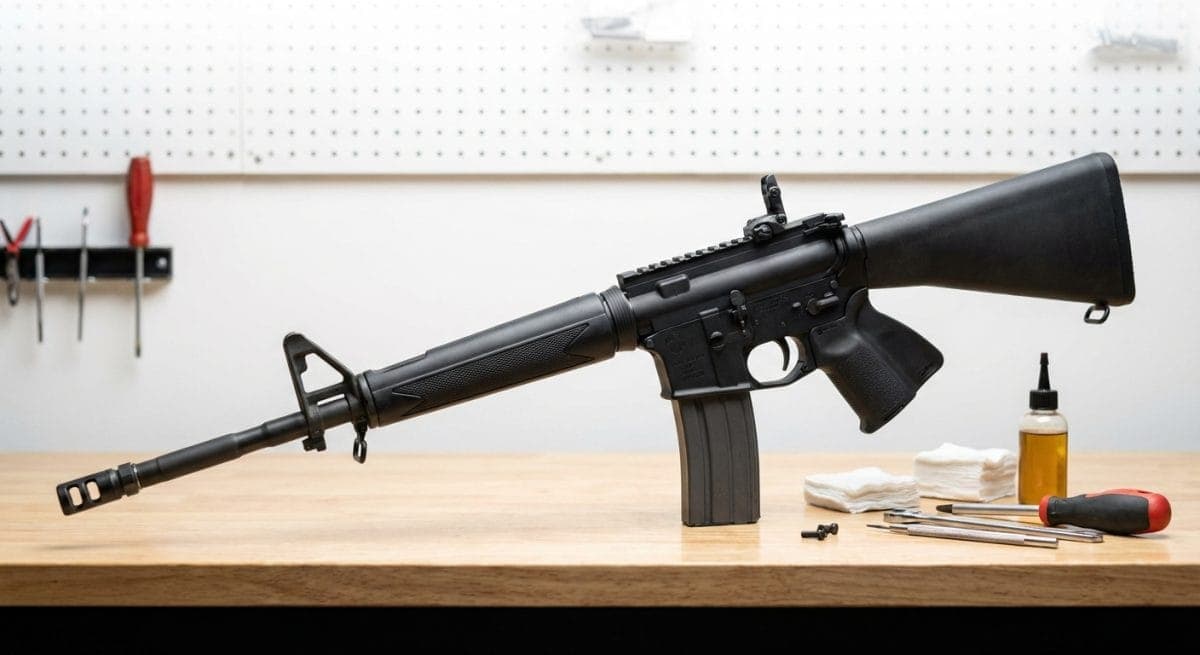
A featureless AR-15 in California must lack certain characteristics that would classify it as an assault weapon. Specifically, a semi-automatic centerfire rifle with a detachable magazine cannot have:
- A pistol grip that protrudes conspicuously beneath the action
- A thumbhole stock
- A folding or telescoping stock
- A grenade launcher or flare launcher
- A flash suppressor
- A forward pistol grip
The most significant modification for AR-15 builders is addressing the pistol grip requirement. California compliant builds typically use grip fins or featureless grips that prevent the web of your hand from falling below the trigger line.
Complete Featureless AR-15 Parts List
Here’s a comprehensive parts list for building a California compliant featureless AR-15. Each component has been selected for reliability and legal compliance:
Upper Receiver Components
- Upper Receiver: Forged or billet upper (View options on AR15 Outfitters)
- Barrel: 16-inch or longer to avoid SBR classification
- Muzzle Device: Compensator or brake (not flash suppressor)
- Gas Block: Low-profile .750″ diameter for most barrels
- Gas Tube: Mid-length for 16-18″ barrels, rifle-length for 18″+
- Handguard: Free-float or drop-in without forward grips
- Bolt Carrier Group: Full-auto or semi-auto BCG
- Charging Handle: Standard or ambidextrous
Lower Receiver Components
- Lower Receiver: Forged or billet lower (Browse lowers on AR15 Outfitters)
- Lower Parts Kit: Standard LPK minus pistol grip
- Featureless Grip: Thordsen FRS-15, Sparrow Dynamics, or similar
- Fixed Stock: A2 stock, Magpul MOE Fixed, or ACE skeleton stock
- Buffer Tube Assembly: Rifle-length for fixed stocks
- Buffer and Spring: Rifle buffer (5.0 oz typical) and rifle spring
- Trigger: Mil-spec or upgraded single-stage/two-stage
Essential Tools for Your Build
Proper tools ensure a safe and successful assembly. Here’s what you’ll need:
- Vise: Bench-mounted with minimum 4-inch jaws
- Upper Receiver Vise Block: Clamshell or rod-style
- Lower Receiver Vise Block: Magazine well block preferred
- Armorer’s Wrench: For castle nut and barrel nut installation
- Torque Wrench: 1/2″ drive, capable of 80 ft-lbs minimum
- Punch Set: Roll pin punches in 1/16″, 5/64″, 3/32″, 1/8″
- Hammer: Brass or nylon face to prevent marring
- Allen Keys: Metric and standard sets
- Headspace Gauges: GO and NO-GO gauges for your caliber
- Anti-seize Compound: For barrel nut threads
- Blue Loctite: Medium-strength threadlocker
Step-by-Step Assembly Instructions
Lower Receiver Assembly
Step 1: Install the Magazine Catch
Insert the magazine catch into the left side of the receiver. From the right side, place the magazine catch spring over the threaded portion, then thread on the magazine catch button. Depress the magazine catch fully, and rotate the button approximately 7-8 full turns until it sits flush with the receiver.
Step 2: Install the Bolt Catch
Place the bolt catch spring and plunger into the receiver’s bolt catch pocket. Compress the spring with a 1/8″ punch while aligning the bolt catch. Drive the roll pin through using a 5/64″ punch. The pin should be centered and flush on both sides.
Step 3: Install the Trigger Guard
Insert the trigger guard into the front lug first, then rotate into position. Drive the rear roll pin using a 5/64″ punch. Support the receiver ears to prevent cracking: typically 2-3 firm taps suffice.
Step 4: Install the Featureless Grip
California compliant grips vary by manufacturer. For a Thordsen FRS-15: align the grip with the receiver, insert the safety detent and spring into the grip’s channel, then secure with provided hardware. Torque grip screw to manufacturer specifications, typically 35-65 inch-pounds.
Step 5: Install the Fire Control Group
Insert the trigger into the receiver, aligning the pin holes. Drive the trigger pin from left to right. Install the disconnector spring (bronze color) on the trigger, add the disconnector, then install the hammer with hammer spring legs resting on the trigger pin. Drive the hammer pin from left to right. Hammer spring force typically measures 4.5-5.5 pounds.
Step 6: Install the Safety Selector
With hammer cocked, insert the safety from the left side. The detent should engage the safety’s grooves with approximately 0.010-0.015″ spring compression.
Step 7: Install the Fixed Stock
Thread the rifle buffer tube into the receiver. Apply a drop of blue Loctite to threads. Align the buffer retainer hole and torque to 35-40 ft-lbs. Install buffer retainer and spring, then insert rifle buffer and spring. Attach fixed stock per manufacturer instructions.
Upper Receiver Assembly
Step 8: Install the Barrel
Apply anti-seize to upper receiver threads. Insert barrel extension into receiver, ensuring the indexing pin aligns with the receiver slot. Thread on the barrel nut hand-tight, then torque to 30 ft-lbs minimum. If timing marks don’t align, continue tightening up to 80 ft-lbs maximum. Most builds require 35-55 ft-lbs for proper alignment.
Step 9: Check Headspace
Insert GO gauge into chamber with bolt. The bolt should close completely. Insert NO-GO gauge: the bolt should not close. Typical headspace measures 1.4636″ minimum to 1.4706″ maximum for 5.56 NATO.
Step 10: Install Gas System
Slide gas block over barrel, aligning gas port holes. For a 0.750″ barrel, the gas block should slide on with minimal resistance. Secure with set screws torqued to 30-35 inch-pounds, or cross pins if applicable. Insert gas tube through gas block and into receiver. The tube should extend approximately 3.5″ into the receiver for mid-length systems.
Step 11: Install Muzzle Device
Thread on your compensator or brake. Time the device using crush washer or shims. Torque to 15-20 ft-lbs for most devices. Ensure the device doesn’t qualify as a flash suppressor under California law.
Step 12: Install Handguard
Installation varies by type. For free-float rails, torque the mounting hardware to manufacturer specifications, typically 35-45 inch-pounds for aluminum handguards. Verify the handguard doesn’t contact the gas block: maintain 0.050″ minimum clearance.
Step 13: Install BCG and Charging Handle
Insert charging handle partially into upper receiver. Slide bolt carrier group into receiver, ensuring the bolt is fully forward. Push both components fully forward until the charging handle latches.
Final Assembly
Step 14: Mate Upper and Lower
With the hammer cocked and safety on, align the upper and lower receivers. Push the takedown pin through first, then pivot closed and insert the pivot pin. Function check all controls before proceeding.
Common Mistakes to Avoid
Building your first featureless AR-15 can involve several pitfalls. Here are the most common errors and how to prevent them:
Using Non-Compliant Parts: Double-check that your muzzle device isn’t classified as a flash suppressor. Many “hybrid” devices are marketed as brakes but may be interpreted as flash suppressors by law enforcement.
Improper Grip Installation: Featureless grips must prevent your thumb from wrapping around the grip. Test your grip configuration: if you can wrap your thumb around and touch your middle finger, the build isn’t compliant.
Over-torquing Components: Upper receiver threads typically yield at 90-100 ft-lbs. Stay within specifications to avoid damage. Similarly, over-torquing gas block set screws can dimple barrels excessively, potentially affecting accuracy.
Incorrect Buffer System: Fixed stocks require rifle-length buffer systems. Using carbine components results in bolt carrier overtravel and potential damage. Rifle buffers weigh approximately 5.0-5.4 ounces versus 3.0 ounces for carbine buffers.
Magazine Compatibility Issues: Some featureless grips may interfere with certain magazine releases or larger magazine bodies. Test fit your preferred magazines before finalizing the build.
Testing and Verification
After assembly, perform these checks:
- Safety Function: With hammer cocked and safety on, pull trigger. No movement should occur. Switch to fire: the hammer should fall.
- Trigger Reset: Slowly release trigger after firing. You should hear/feel a distinct click at reset point, typically 0.100-0.150″ forward travel.
- Magazine Insertion/Removal: Magazines should insert smoothly and drop free when release is pressed.
- Bolt Carrier Movement: Manually cycle the action. The BCG should move smoothly through its full travel of approximately 3.875″.
- Compliance Check: Verify all features meet California requirements. Document your build with photos for your records.
Build This on AR15 Outfitters
Ready to start your featureless AR-15 build? The AR15 Outfitters Builder makes parts selection and compatibility checking simple. Our configurator ensures all components work together while highlighting California compliant options.
Start with these builder features:
- Compatibility Checker: Automatically flags non-compliant parts combinations
- Price Comparison: Find the best deals across multiple retailers
- Build Lists: Save and share your featureless configurations
- In-Stock Alerts: Get notified when hard-to-find compliant parts become available
Visit ar15outfitters.com/builder to start configuring your California compliant AR-15 today. The builder includes preset featureless configurations to help you get started, along with detailed specifications for each component.
Building a featureless AR-15 for California requires attention to detail and proper parts selection, but the result is a fully compliant rifle that maintains the AR-15 platform’s modularity and functionality. Take your time during assembly, double-check all regulations, and enjoy your compliant build at the range.
Disclaimer: AR15 Outfitters does not sell firearms. This site is an information and affiliate resource only. All purchases are completed through licensed retailers. Always comply with all federal, state, and local laws when building or purchasing firearms and firearm components.