How to Build an AR-15 from Scratch: Complete Guide
By AR-15 Outfitters · April 9, 2026
AR15 Outfitters may earn a commission on purchases made through links in this guide. This does not affect pricing or our recommendations.
Building an AR-15 from scratch offers complete control over your rifle’s configuration, performance, and budget. This comprehensive guide walks you through selecting compatible parts, assembling them correctly, and avoiding common pitfalls that can compromise safety or function.
The AR-15 platform’s modularity makes it accessible to builders of all skill levels. With basic mechanical aptitude and the right tools, you can assemble a reliable rifle in 2-4 hours. More importantly, you’ll gain intimate knowledge of how your firearm operates, making maintenance and upgrades straightforward.
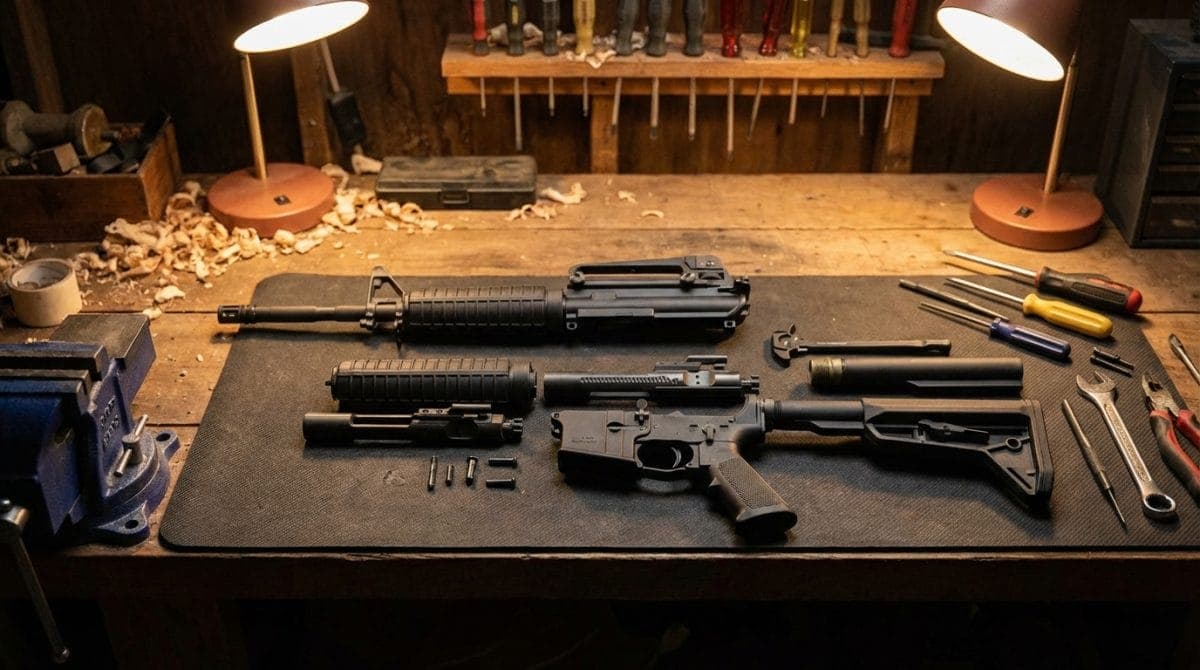
Complete AR-15 Parts List
A complete AR-15 build requires components for two main assemblies: the upper receiver group and the lower receiver group. Here’s everything you need:
Upper Receiver Components
- Upper Receiver: Forged or billet aluminum, typically 7075-T6
- Barrel: Choose length (16″-20″ for rifles), profile, and chambering
- Gas Block: Match diameter to barrel profile (0.625″, 0.750″, 0.875″, or 0.936″)
- Gas Tube: Length depends on gas system (carbine, mid-length, rifle)
- Handguard: Free-float or drop-in style
- Barrel Nut: Often included with handguard
- Muzzle Device: Flash hider, brake, or compensator with 1/2×28 threads
- Bolt Carrier Group (BCG): Complete assembly with bolt, cam pin, and firing pin
- Charging Handle: Standard or ambidextrous
- Forward Assist: Complete assembly with spring and roll pin
- Ejection Port Cover: Assembly with spring and pin
Lower Receiver Components
- Lower Receiver: Serialized firearm component
- Lower Parts Kit: Includes trigger group, safety selector, magazine catch, bolt catch, and pins
- Buffer Tube: Carbine or rifle length
- Buffer: Weight varies (carbine: 3.0 oz, H: 3.8 oz, H2: 4.6 oz, H3: 5.4 oz)
- Buffer Spring: Carbine or rifle length to match tube
- Castle Nut: Secures buffer tube
- End Plate: Standard or QD sling mount
- Stock: Fixed or adjustable
- Pistol Grip: A2 style or ergonomic upgrade
- Grip Screw and Washer: Usually included with grip
Visit the AR15 Outfitters Builder to ensure parts compatibility and compare prices across retailers.
Essential Tools for AR-15 Assembly
Proper tools prevent damage to parts and ensure correct assembly. Here’s what you need:
Required Tools
- Armorer’s Wrench: For barrel nut and castle nut installation
- Vise: Minimum 4″ jaws
- Upper Receiver Vise Block: Prevents receiver damage
- Torque Wrench: 1/2″ drive, capable of 80 ft-lbs
- Punch Set: 1/16″, 5/64″, 3/32″, 1/8″, 5/32″ roll pin punches
- Hammer: Brass or nylon face
- Allen Key Set: Metric and standard
- Castle Nut Wrench: If not included in armorer’s wrench
- Pivot Pin Installation Tool: Simplifies lower assembly
Recommended Additional Tools
- Bench Block: Supports lower receiver during pin installation
- Barrel Nut Alignment Tool: For timing gas tube hole
- Go/No-Go Headspace Gauges: Verify safe chamber dimensions
- Anti-Seize Compound: For barrel nut threads
- Blue Loctite: For accessory screws
Step-by-Step AR-15 Assembly Instructions
Phase 1: Lower Receiver Assembly
Step 1: Install Magazine Catch
- Insert magazine catch through left side of receiver
- Thread magazine catch button from right side
- Depress button fully and rotate catch 6-7 full turns
- Test function: button should spring back when released
Step 2: Install Trigger Guard
- Insert front of trigger guard into forward pin hole
- Compress spring-loaded detent on rear
- Align with rear hole and release
- If using roll pin style: drive pin with 1/8″ punch
Step 3: Install Bolt Catch
- Insert spring into receiver pocket, plunger end up
- Place buffer detent on top of spring
- Position bolt catch and align holes
- Drive roll pin with 5/32″ punch, supporting receiver on bench block
Step 4: Install Pivot and Takedown Pins
- Insert detent springs into receiver holes
- Place detents on springs (pointed end up)
- Use pivot pin tool or 1/4″ clevis pin to compress front detent
- Slide pivot pin through, capturing detent
- Install rear takedown pin similarly
Step 5: Install Safety Selector
- With hammer cocked, insert selector from left side
- Install detent into receiver hole
- Place spring into pistol grip
- Carefully install grip, compressing detent spring
- Thread grip screw with washer: torque to 35-40 in-lbs
Step 6: Install Trigger Group
- Insert trigger with spring legs forward
- Drive trigger pin from left to right
- Install hammer with spring legs on top of trigger pin
- Drive hammer pin, ensuring disconnector moves freely
- Function check: dry fire and verify reset
Step 7: Install Buffer System
- Thread castle nut onto buffer tube (reverse thread)
- Slide end plate over tube
- Thread tube into receiver 6-7 full turns
- Align tube so buffer retainer pin hole is exposed
- Torque castle nut to 40 ft-lbs
- Stake castle nut in at least two places
- Insert buffer spring and buffer
Phase 2: Upper Receiver Assembly
Step 8: Install Forward Assist
- Insert spring into receiver boss
- Slide forward assist pawl through receiver
- Align and drive roll pin with 5/64″ punch
Step 9: Install Ejection Port Cover
- Insert small end of C-clip into receiver groove
- Position cover assembly with spring tension forward
- Compress assembly and snap C-clip into opposite groove
- Verify spring tension closes cover
Step 10: Install Barrel
- Apply thin coat of anti-seize to upper receiver threads
- Slide barrel extension into receiver until fully seated
- Install barrel nut hand-tight
- Torque to 30 ft-lbs, then loosen
- Retorque to 30 ft-lbs minimum, up to 80 ft-lbs maximum
- Align gas tube hole in barrel nut (may require up to 80 ft-lbs)
Step 11: Install Gas System
- Slide gas block onto barrel journal
- Insert gas tube through barrel nut into gas block
- Align gas port in barrel with gas block
- For set screw blocks: torque screws to 30 in-lbs with Loctite
- For pinned blocks: drive roll pin with 5/64″ punch
Step 12: Install Handguard
Installation varies by design. For free-float rails:
- Remove barrel nut if incompatible
- Install proprietary barrel nut per manufacturer specs
- Time anti-rotation tabs if present
- Slide handguard over nut and secure with screws
- Torque mounting screws to manufacturer specification (typically 25-35 in-lbs)
Step 13: Install Muzzle Device
- Verify threads are 1/2×28 (5.56/.223) or 5/8×24 (.308)
- Install crush washer with convex side toward device
- Thread device hand-tight
- Time ports/slots correctly (if applicable)
- Torque to 20-30 ft-lbs or use shims for precise timing
Step 14: Install BCG and Charging Handle
- Pull bolt fully forward in carrier
- Insert charging handle partially into upper
- Slide BCG onto charging handle
- Push both fully forward until BCG locks into barrel extension
Phase 3: Final Assembly and Function Check
- Mate upper and lower receivers with pivot pin
- Close with takedown pin
- Perform safety check: selector functions in both positions
- Charging handle cycles smoothly
- Trigger resets properly when cycling action
- Magazine inserts and drops free
- Bolt locks back on empty magazine
Common Mistakes to Avoid
Parts Compatibility Errors
- Wrong Gas System Length: Carbine gas tubes measure 7.5″, mid-length 9.5″, rifle 13″. Match to barrel’s gas port location.
- Incorrect Buffer Weight: Carbine systems typically need heavier buffers (H or H2) with modern ammunition
- Commercial vs Mil-Spec Confusion: Buffer tubes differ in diameter (1.17″ vs 1.14″). Match your stock accordingly.
Assembly Mistakes
- Over-torquing Castle Nut: Exceeding 40 ft-lbs can strip receiver threads
- Backwards Hammer Spring: Legs must rest on TOP of trigger pin
- Gas Block Misalignment: Use gauge pins or verify visually through barrel
- Missing Gas Rings: BCG needs all three for proper function
- Improper Headspace: Always verify with gauges when using different bolt/barrel combinations
Safety Issues
- Unstaked Castle Nut: Can loosen during fire, causing malfunction
- Loose Barrel Nut: Minimum 30 ft-lbs prevents dangerous barrel movement
- Wrong Ammunition: Never use 5.56 NATO in .223 Remington-only chambers
Testing Your Build
Before live fire, perform these checks:
- Headspace Verification: GO gauge should close, NO-GO should not
- Function Test: Cycle dummy rounds to verify feeding and extraction
- Gas System Check: Single-load first rounds to verify cycling
- Trigger Reset: Confirm disconnector engagement after each shot
Start with 5-10 single rounds before loading full magazines. This identifies issues before they become dangerous.
Build This on AR15 Outfitters
Ready to build your AR-15 from scratch? The AR15 Outfitters Builder streamlines parts selection with built-in compatibility checking. The platform compares prices across major retailers, ensuring you get quality parts at the best price.
Key features for builders:
- Real-time compatibility verification prevents ordering mismatched components
- Price history tracking shows when to buy
- Complete build lists can be saved and shared
- Direct links to retailer product pages
- Community reviews help identify quality parts
Start your build at ar15outfitters.com/builder. Select your lower receiver first, as this determines mil-spec or commercial compatibility for other components. The builder automatically filters compatible parts as you progress, eliminating guesswork from your first AR-15 build.
Remember: building an AR-15 from scratch gives you complete control over quality, features, and cost. With proper tools and attention to detail, your custom rifle will deliver years of reliable service. Take your time, double-check compatibility, and enjoy the process of creating exactly the rifle you want.
Disclaimer: AR15 Outfitters does not sell firearms. This site is an information and affiliate resource only. All purchases are completed through licensed retailers. Always comply with all federal, state, and local laws when building or purchasing firearms and firearm components.