How to Build a Suppressor-Ready AR-15
By AR-15 Outfitters · April 9, 2026
AR15 Outfitters may earn a commission on purchases made through links in this guide. This does not affect pricing or our recommendations.
Introduction to Building a Suppressor-Ready AR-15
Building a suppressor-ready AR-15 requires specific component selection and attention to detail that goes beyond a standard build. When configured properly, your rifle will run reliably with and without a suppressor while minimizing gas blowback, reducing wear on parts, and maintaining consistent accuracy. This guide walks through every aspect of assembling an AR-15 optimized for suppressed shooting, from barrel selection to gas system tuning.
A properly built suppressor-ready AR-15 addresses three primary concerns: increased backpressure from the suppressor, additional weight at the muzzle, and the need for reliable cycling with varying ammunition types. By selecting the right components and following proper assembly procedures, you’ll create a rifle that performs optimally in both suppressed and unsuppressed configurations.
Complete Parts List for Suppressor-Ready AR-15 Build
The following components are specifically chosen for optimal suppressed performance. Each part plays a role in managing the increased gas pressure and ensuring reliable operation.
Upper Receiver Components
- Upper Receiver: Forged or billet upper receiver – Select on AR15 Outfitters Builder
- Barrel: 11.5″ to 16″ barrel with 1/2×28 or 5/8×24 threads (depending on caliber), medium to heavy profile – Browse Barrels
- Gas Block: Adjustable gas block (0.750″ typical for most barrels) – View Gas Blocks
- Gas Tube: Appropriate length for barrel (carbine for 11.5-14.5″, mid-length for 16″) – Select Gas Tube
- Bolt Carrier Group: Full-auto profile BCG with enhanced gas rings – Browse BCGs
- Charging Handle: Gas-deflecting charging handle (Radian Raptor SD or similar) – View Charging Handles
- Muzzle Device: Suppressor-compatible muzzle brake or flash hider – Browse Muzzle Devices
- Handguard: Free-float handguard, minimum 1.5″ inner diameter for suppressor clearance – Select Handguard
Lower Receiver Components
- Lower Receiver: Forged or billet lower receiver – Browse Lowers
- Buffer System: H2 or H3 buffer (4.6-5.4 oz) with standard carbine spring – View Buffer Systems
- Stock: Adjustable carbine stock – Select Stock
- Lower Parts Kit: Standard AR-15 LPK with enhanced trigger optional – Browse LPKs
- Grip: Standard A2 or ergonomic pistol grip – View Grips
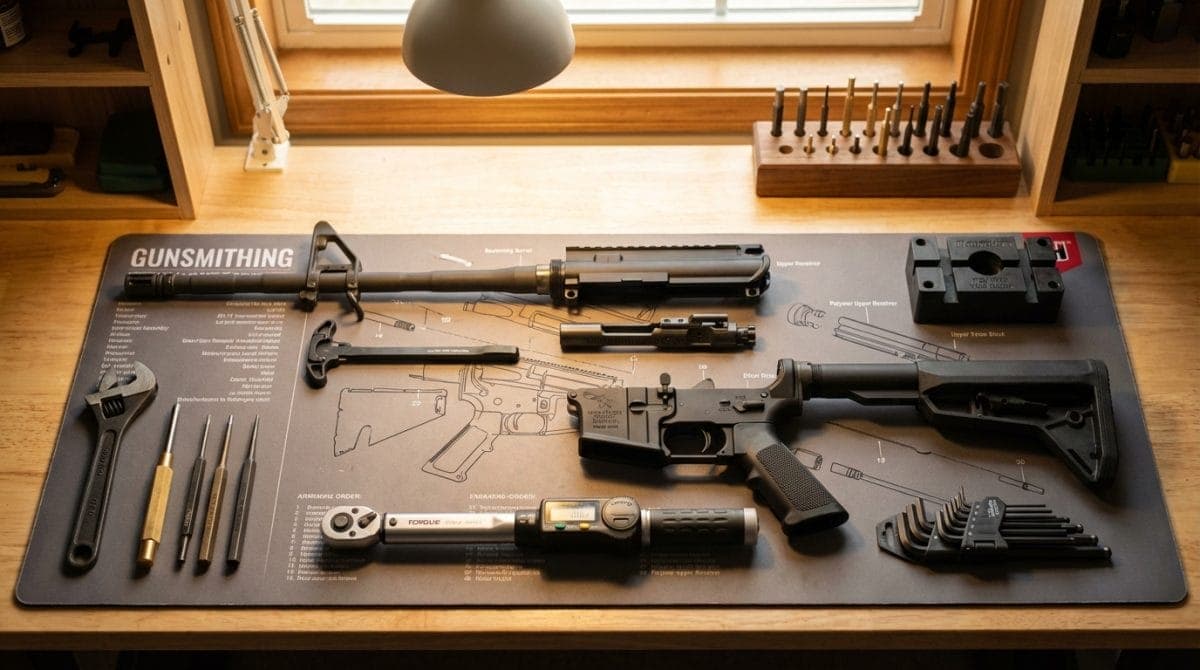
Required Tools
Proper tools ensure correct assembly and prevent damage to components. The following list includes both essential and recommended tools:
- Essential Tools:
- Armorer’s wrench with castle nut tool
- Barrel nut wrench (specific to handguard system)
- Upper receiver vise block
- Torque wrench (capable of 30-80 ft-lbs)
- Punch set (brass and steel)
- Hammer (brass and nylon)
- Allen key set (metric and standard)
- Barrel vise blocks (for muzzle device installation)
- Recommended Tools:
- Action rod for upper receiver work
- Go/No-go headspace gauges
- Aeroshell 33MS or similar grease
- Blue Loctite 242
- Anti-seize compound
Step-by-Step Assembly Instructions
Lower Receiver Assembly
Step 1: Install Magazine Catch
Insert the magazine catch from the left side of the receiver. From the right side, place the magazine catch spring over the threaded portion, then thread on the magazine catch button. Depress the magazine catch fully from the left side and rotate the button clockwise 4-5 full turns until the button sits flush with the receiver.
Step 2: Install Trigger Guard
Insert the trigger guard pin from the left side, capturing the forward portion of the trigger guard. Carefully tap it through using a nylon hammer. Support the receiver ears to prevent cracking.
Step 3: Install Bolt Catch
Position the bolt catch spring and detent in the receiver pocket. Insert the bolt catch over them and align the holes. Drive the roll pin through from right to left using a 3/32″ punch. The roll pin should be flush on both sides.
Step 4: Install Pivot and Takedown Pins
Insert detent springs into their respective holes. Drop detents on top (pointed end up). Install the pivot pin first, capturing its detent with the installed trigger guard. The takedown pin detent will be captured by the buffer tube end plate.
Step 5: Install Fire Control Group
Place trigger into receiver and insert trigger pin from left to right. Install hammer with hammer spring legs resting on top of the trigger pin. Drive hammer pin from left to right. Verify smooth operation and proper spring tension.
Step 6: Install Safety Selector
With hammer cocked, insert safety detent (pointed end up) and spring into receiver. Install pistol grip, ensuring the safety spring enters the hole in the grip. Insert safety selector from the left side, rotating to capture the detent. Torque grip screw to 35-40 inch-pounds.
Step 7: Install Buffer Tube Assembly
Thread castle nut onto buffer tube, followed by end plate (ensure takedown pin detent cutout faces down). Apply small amount of Aeroshell 33MS to buffer tube threads. Thread tube into receiver 6-7 full turns until the buffer detent hole aligns. Tighten castle nut to 40 ft-lbs and stake in at least two places.
Step 8: Install Buffer and Spring
Insert buffer retainer and spring into receiver. Drop buffer spring into tube, followed by the H2 or H3 buffer. For suppressor-ready builds, an H2 buffer (4.6 oz) provides a good starting point for most configurations.
Upper Receiver Assembly
Step 9: Install Barrel
Apply Aeroshell 33MS to barrel extension and upper receiver threads. Slide barrel into upper receiver, ensuring the barrel extension pin aligns with the receiver slot. Hand-tighten barrel nut initially.
Step 10: Install Gas Block and Tube
Slide gas tube through the upper receiver and into the gas block. Ensure proper alignment (gas tube should not bind). For adjustable gas blocks, position at 0.750″ from the shoulder for most barrels. Secure set screws with blue Loctite, torquing to manufacturer specifications (typically 15-20 inch-pounds).
Step 11: Torque Barrel Nut
Using appropriate wrench and torque wrench, tighten barrel nut to 35-80 ft-lbs. Most manufacturers specify 40-60 ft-lbs. Align gas tube with upper receiver gas tube hole. If using a free-float handguard with proprietary barrel nut, follow manufacturer torque specifications.
Step 12: Install Handguard
Follow manufacturer-specific instructions. Most free-float systems require timing the barrel nut, then sliding the handguard over and securing with provided hardware. Ensure minimum 1.5″ inner diameter for suppressor compatibility.
Step 13: Install Muzzle Device
Check barrel threads for damage or debris. Apply Rocksett or high-temperature thread locker to threads. Thread muzzle device hand-tight, then torque to 20-30 ft-lbs using barrel vise blocks. Time the device appropriately if using a brake or compensator (ports facing up/sides).
Step 14: Install BCG and Charging Handle
Insert charging handle into upper receiver, sliding it back partially. Drop BCG onto charging handle rails with bolt in forward position. Push both fully forward until charging handle latches.
Final Assembly and Function Check
Step 15: Mate Upper and Lower
Push out takedown and pivot pins. Align upper receiver lugs with lower receiver and push pins through. Verify smooth fit without excessive play.
Step 16: Function Check
Perform complete function check: safety selector operation in both positions, trigger reset, bolt catch functionality, and charging handle operation. Verify buffer spring tension by pulling BCG fully rearward.
Gas System Tuning for Suppressed Use
Adjustable gas blocks allow fine-tuning for optimal performance with and without suppressors. Start with the gas block fully open, then close incrementally while testing:
- Fire 5 rounds unsuppressed, verify reliable ejection at 3-4 o’clock
- Reduce gas setting by 1/4 turn, repeat testing
- Continue until bolt fails to lock back on empty magazine
- Open 1/2 turn from this point for unsuppressed baseline
- Attach suppressor and repeat process
- Mark both settings on the gas block for quick adjustment
Typical ejection patterns: 2-3 o’clock indicates overgassing, 3-4 o’clock is optimal, 4-5 o’clock may indicate undergassing.
Common Mistakes to Avoid
Incorrect Buffer Weight: Using a standard carbine buffer (3 oz) often results in violent cycling when suppressed. H2 buffers work for most 11.5-16″ barrels, while H3 buffers may be needed for shorter configurations.
Fixed Gas Blocks on Short Barrels: Barrels under 12.5″ typically experience significant overgassing when suppressed. Adjustable gas blocks become nearly mandatory for these configurations.
Inadequate Handguard Clearance: Many suppressors require 1.6-1.8″ outer diameter clearance. Slim handguards may not accommodate larger suppressors, requiring rail removal or handguard replacement.
Wrong Thread Pitch: Verify your barrel thread pitch matches your suppressor mount. Common pitches include 1/2×28 for 5.56/.223 and 5/8×24 for .308/6.5.
Overlooking Gas-Defeating Features: Standard charging handles allow significant gas leakage when suppressed. Gas-defeating models reduce shooter discomfort significantly.
Improper Muzzle Device Installation: Under-torqued muzzle devices can loosen under suppressor use. Always use proper thread locker and torque specifications.
Testing and Optimization
After assembly, conduct systematic testing to ensure reliable function:
| Test Phase | Configuration | Expected Result |
|---|---|---|
| Initial Function | Unsuppressed, full gas | 100% reliability, 3-4 o’clock ejection |
| Gas Tuning | Unsuppressed, adjusted | Reliable with minimal gas |
| Suppressed Test | Suppressed, retuned | Smooth cycling, 3-4 o’clock ejection |
| Ammunition Variety | Both configurations | Functions with 55-77gr loads |
Build This on AR15 Outfitters
Ready to build your own suppressor-ready AR-15? The AR15 Outfitters Builder makes it easy to select compatible components and compare prices across multiple vendors. The builder automatically checks part compatibility and provides real-time pricing from trusted retailers.
Start your suppressor-ready AR-15 build by visiting ar15outfitters.com/builder and selecting components optimized for suppressed shooting. The platform’s compatibility checking ensures all parts work together, while the price comparison feature helps you find the best deals on quality components.
Whether building your first AR-15 or adding a dedicated suppressor host to your collection, the AR15 Outfitters builder simplifies the process while ensuring you select the right parts for reliable suppressed operation.
Disclaimer: AR15 Outfitters does not sell firearms. This site is an information and affiliate resource only. All purchases are completed through licensed retailers. Always comply with all federal, state, and local laws when building or purchasing firearms and firearm components.